
About 100% of daily movement relies on a stable midsection, so treating this area as optional weakens posture and can spark low‑back pain.
Coaches like Marvin Burton say those deep layers can’t be “switched off.” That matters: a strong midsection helps you lift heavier, run cleaner, and move with better balance.
This short guide outlines practical core strengthening routines you can plug into your week. You’ll learn what the core includes, how to engage it safely, and which moves build visible abs while protecting your back.
We cover beginner to advanced progressions—anti‑extension, rotation and lateral stability—plus breathing and bracing cues that improve posture and whole‑body control for sport and daily life.
For specific movement examples like planks, bridges, and anti‑rotation work, see the best core exercises to match skill and equipment.
Key Takeaways
- Daily movement depends on a stable midsection for posture and injury prevention.
- Learn to engage the midsection correctly before heavier lifts or sport.
- Progress from basic to advanced exercises to build balanced strength.
- Breathing and bracing cues protect the back and improve posture.
- Use scalable equipment options to increase intensity safely.
Why Core Strength Matters Right Now
A strong midsection changes how you stand, move, and perform every day. It supports posture from neck to pelvis and helps your spine stay in a neutral position.
Posture, balance, and everyday movement
Good midsection work reduces strain on the back during simple tasks like carrying groceries or sitting at a desk for a long time. Improved stability also boosts balance and control, so you move more confidently on stairs or uneven ground, and consider exploring complete strength training program for additional techniques.
Athletic performance and injury prevention
Studies show three weekly Pilates sessions improved postural stability in men over two months. Weak deep muscles link to higher risk of low‑back pain in runners. A stronger midsection helps transfer force through the body so your shoulders and hips stay aligned.
| Benefit | How it helps | When you notice it |
|---|---|---|
| Posture | Spine stacks in neutral position | Within weeks of regular practice |
| Performance | Better force transfer for lifting and running | During heavier lifts and longer runs |
| Injury reduction | Supports joint position and reduces compensations | Over months, with varied exercises |
- Quick wins: fewer aches and better endurance in postural tasks.
- Long-term: safer, more powerful movement in gym and sport.
What Your “Core” Really Includes
Think of the midsection as a 360-degree support belt that links your hips, ribs, and spine. The trunk is a team of layers that stabilize and move you, not just the visible front wall.
Front and side: visible movers
The rectus abdominis creates trunk flexion while the internal and external obliques rotate and bend the torso. The transverse abdominis wraps the front and side like a corset to steady the pelvis during lifts and daily tasks.
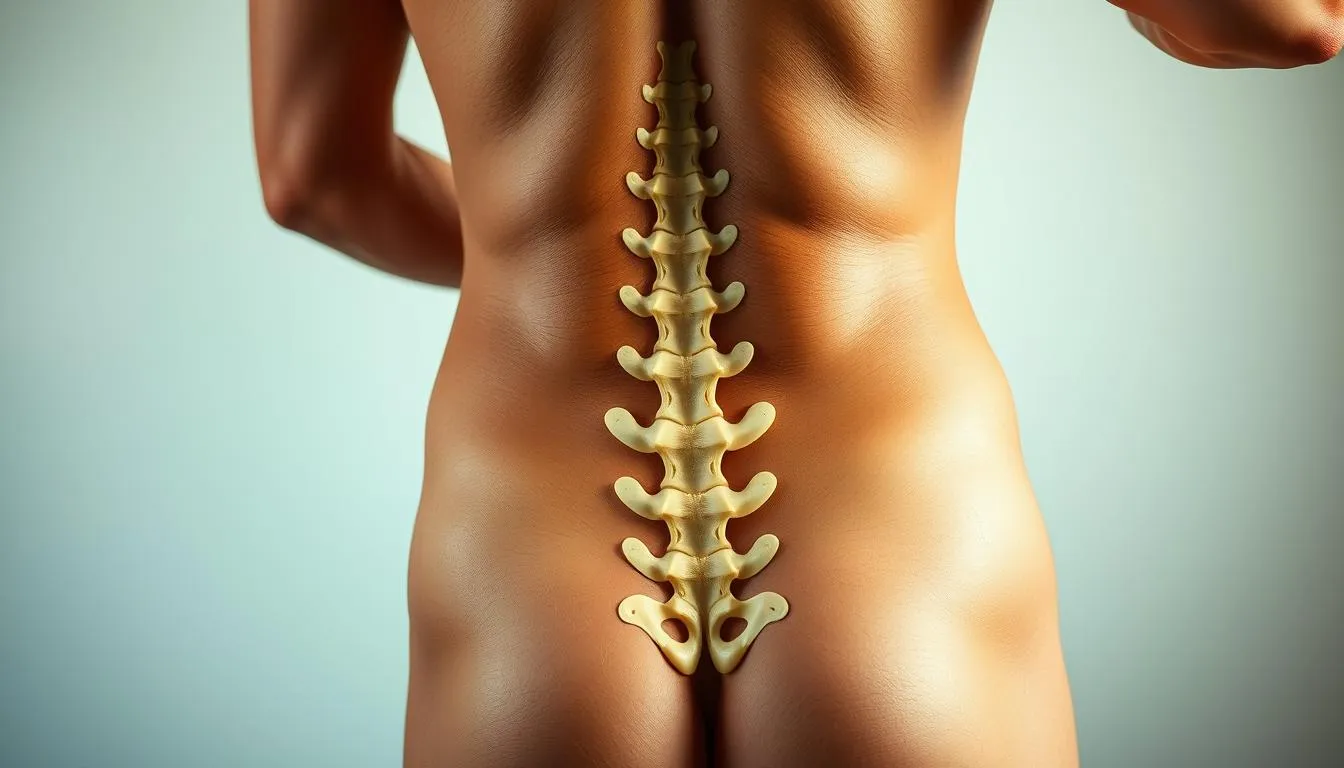
Spinal supporters
The multifidus and erector spinae run along the back and help extend and support the spine. These deep muscles control small, precise motion and keep the vertebrae aligned when you bend and lift.
The often-forgotten team
The pelvic floor and diaphragm coordinate breathing and pressure management. Glutes, hip flexors, hamstrings, and adductors link leg force to the pelvis and offload the lower back.
| Region | Primary muscles | Key role |
|---|---|---|
| Front/Side | Rectus abdominis, obliques, transverse abdominis | Flexion, rotation, pelvic stabilization |
| Back | Multifidus, erector spinae | Spine support and extension |
| Base & Hips | Pelvic floor, diaphragm, glutes, hip flexors | Breath/pressure control and force transfer |
Training should address front, side, and back to build balanced activation and avoid overworking a single area. Understanding these parts helps you pick exercises that fix weak links instead of repeating the same front-only moves.
How to Engage Your Core Before Every Set
Before you lift, set a reliable brace so every rep starts from a safe, stable position. This brief warm-up teaches your body how to protect the spine and produce clean force during any movement.
Breathing and bracing: inhale through the nose, expand the ribs, then draw the belly button gently toward the spine while still breathing. This creates the starting position without holding your breath and keeps pressure steady during effort.
Floor drill: press lower back to the floor and hold
Lie on your back with knees bent and feet on the floor. Place your hands by your hips and press the lower back into the ground so a hand cannot slide under the lumbar curve.
Hold the press for 6–10 seconds, relax, and repeat for several cycles. This grooves the pattern so you can return starting position safely when you move to dynamic sets.
Standing drill: glutes on, ribs down, neutral spine
Stand tall, squeeze the glutes lightly, lower the ribs, and find a neutral spine. Replicate the same belly-to-spine contraction while keeping breathing smooth.
- Keep the brace during each movement by exhaling slightly on effort and avoiding breath holds.
- Progress from the floor drill to standing practice to make the pattern automatic in sport and daily tasks.
- Make these quick priming checks a habit before every session to ensure hips and back stay supported.
| Drill | Key cue | Rep range |
|---|---|---|
| Breath‑brace | Inhale, rib expansion, draw belly button in | 3–5 breaths to practice |
| Floor press | Press lower back to ground; block hand | Hold 6–10 seconds × 4–6 reps |
| Standing transfer | Glutes on, ribs down, neutral position | 3–5 holds during warm-up |
Core Strengthening Routines for Beginners
Start here with four simple moves that teach control and protect the lower back.
Glute bridge and return to starting position
Lie on the floor with knees bent and feet hip‑width. Brace the midsection, squeeze the glutes, and lift hips until shoulders, knees, and hips align.
Pause briefly, then return to starting position under control. Keep knees tracking with hips to avoid wobble.
Dead bug with opposite arm and left/right leg reach
From the starting position, arms up and knees at 90°, extend the right arm and left leg toward the ground. Keep the lower back flat to the floor and switch sides slowly.
Bird dog: right arm, left leg in a straight line
On all fours, brace and extend the right arm and left leg in a straight line. Hold briefly, then return and repeat on the other side.
Supine toe taps for low back-friendly activation
Lie supine, brace, lift both knees to 90°, and tap one foot lightly to the ground. Alternate while keeping pelvic control and calm breathing to protect the lower back and engage abdominal muscles.
- Plan: 3 sets of 8–12 reps per exercise; rest 45–60 seconds.
- Focus on slow tempo and feel of the core and glutes, not speed.
- If you sense strain in the lower back, shorten the leg reach so contact with the ground stays controlled.
Intermediate Routines to Build Stability and Strength
Move beyond basic holds with intermediate patterns that build usable stability and controlled force. These drills link static bracing to dynamic movement and teach the body to manage load while you breathe.
Plank and anti-extension progressions
Standard plank: from the floor with feet hip-width and elbows under shoulders, create a straight line from head to heels. Brace the core and squeeze glutes to keep the back flat.
Progress anti-extension by adding a plank pull-through or a light plate on the back instead of chasing longer time. These options build quality stability and lasting strength.
Controlled flexion: warrior crunch and bicycle crunch
Warrior crunch: stand wide, toes out, hands by the chest. Drop into a squat, then side-bend toward each thigh with control to train frontal-plane stability.
Bicycle crunch: from the starting position on your back, rotate the chest toward the opposite knee. Keep the low back anchored and elbows wide for safer, cleaner reps.
Mountain climbers for time-under-tension
Begin in a high plank with hands under shoulders. Drive the left leg, then the right, toward the chest while keeping hips level.
Use steady rhythm and aim for 3–4 sets of 20–40 seconds for planks and climbers, and 10–15 reps for crunches. Small tweaks, like spreading hands and feet slightly, can increase your base while you learn.
| Move | Key cue | Progression | Sets / Time |
|---|---|---|---|
| Standard plank | Elbows under shoulders, straight line head→heels | Plank pull-through, plate on back | 3–4 × 20–40 sec |
| Warrior crunch | Toes out, hands at chest, side-bend with control | Add rotation or light weight once stable | 3 × 10–15 reps each side |
| Mountain climbers | Hands under shoulders, hips level | Slow tempo for time-under-tension | 3–4 × 20–40 sec |
Advanced Routines for Full-Core Challenge
Advanced moves push your midsection to handle real-world loads and full-body coordination. These drills link breath, tension, and precise motion so you build usable strength without sacrificing safety.

Hanging leg raise and hollow rock
Hanging leg raise: start from a dead hang, brace, and lift legs to thigh‑perpendicular while avoiding swing. Slightly bent knees cut hip‑flexor dominance and protect the back.
Hollow rock: on the floor press the low back into the ground, lift shoulders and legs, and rock in a tight banana shape. Keep breathing steady and spinal contact continuous.
Barbell rollouts and plank pull-throughs
Barbell rollout: from knees or standing, roll the bar forward under control. Maintain a rigid trunk, keep hips in line, and pull back without arching to protect the spine and recruit the right muscles.
Plank pull‑through: set a high plank with a dumbbell to one side. Reach across with the opposite hand and drag the weight under you while keeping shoulders and hips square.
Turkish get‑up for spine stability and total-body control
Turkish get‑up: lock the arm with a manageable weight overhead, drive through the floor to sit, bridge, sweep the leg, half‑kneel, then stand tall. Reverse the steps to return starting in perfect control.
Keep the spine long, eyes on the weight, and use the free hand to steady transitions. Use moderate weight so each rep stays crisp. Program 3–5 sets of 5–8 reps (or 15–30 seconds for hollow rocks) to build lasting strength.
Rotation, Anti-Rotation, and Lateral Stability Blocks
Rotate, resist, and brace: train movement across multiple planes to make your torso more useful in sport and daily life.
Rotational moves build torque and sequencing. Try Russian twists on the floor to rotate the torso from side to side while keeping a neutral spine and steady breathing. Use a cable woodchop from high to low and pull in a straight line, pivoting through the hips to transfer power safely.
Anti-rotation and unilateral load
Pallof press trains resistance to twist: stand tall, press the handle away, and resist the cable without letting the shoulders turn. A single-arm farmer’s carry forces anti-lateral control—hold a heavy dumbbell at one side, keep the ribs down, and maintain a tall line to stop side bend.
Lateral and standing options
Include side bends sparingly and pair them with anti-lateral work to avoid overloading one pattern. Standing variations recruit hips and shoulders together and transfer better to running, throwing, and change-of-direction movements.
“Keep feet grounded and core braced; don’t let the pelvis drift or the low back compensate during rotation or resistance.”
- Rotate: Russian twists, cable woodchop for standing power.
- Resist: Pallof press, single-arm carry to stop unwanted twist or side bend.
- Mix planes: cycle one rotational, one anti-rotation, and one lateral drill for 2–3 rounds.
| Focus | Example | Key cue |
|---|---|---|
| Rotation | Russian twist / cable woodchop | Neutral spine; pull in a straight line; pivot hips |
| Anti-rotation | Pallof press / single-arm carry | Stand tall; resist twist; keep ribs down |
| Lateral control | Side bend + anti-lateral carry | Balance bending with resisting drills |
Low-Back Safe Core Training Tips
Keep the low‑back safe by training with cues that lock your spine in a neutral, repeatable position. Small changes in alignment and breathing reduce strain and let you train longer with better form.
Neutral spine cues: head, chest, hips in line
Align the head over the chest and the chest over the hips to create one straight line from crown to tailbone.
Keep ribs down and pelvis level. This helps stop excess arching that can cause pain.
Regressions that protect the lower back
If crunches bother your back, use toe taps, dead bugs, or bird dogs instead. These keep contact with the floor and limit lumbar load.
Set feet and knees to a stable base. Brace gently before each leg move and exhale on effort to hold pressure without breath holding.
- Stop if sharp pain appears; lower range or weight and refocus cues.
- When in doubt, slow down. Quality reps build capacity to progress safely.
| Tip | Why it helps | Quick action |
|---|---|---|
| Head‑chest‑hips line | Maintains neutral spine and reduces shear | Tuck chin slightly; lift chest; square hips |
| Floor regressions | Reduces lumbar load during flexion | Choose toe taps, dead bug, bird dog |
| Breath‑brace | Controls intra‑abdominal pressure safely | Inhale, brace, exhale on exertion |
Equipment-Assisted Core Finishers
Use tools to load the midline safely and finish sessions with high-quality, brief work that trains stability, rotation, and power.
TRX row for integrated pulling
Set the handles with your hands at chest height and walk your feet forward to the starting position. Keep the body rigid and row by squeezing the shoulder blades while bracing the midsection.
This suspended pull is a great way to tie upper-back muscles to trunk control because the torso must stay still while the arms move.
Medicine ball slams with full overhead reach
Reach the ball fully overhead to stretch the front of the body, then drive it to the floor using the trunk rather than just the arms.
Catch the rebound safely, reset, and repeat. Focus on crisp movement quality over speed and choose a moderate weight so you keep control.
Cable woodchops: high to low in a straight line
Set the pulley high, step out, and pull the handle down across the front of the body. Pivot through the hips, keep the shoulders square, and avoid twisting the low back.
Use moderate weight for 8–12 reps or 20–30 seconds per finisher, then return starting position carefully between sets.
- Rotate these finishers 2–3 days per week to spike activation without overtaxing stabilizers.
- For cable variations, see targeted cable ab finishers for progressions and cues.
Form Cues: From Starting Position to the Final Rep
Every rep should start with purpose: steady hands, tall shoulders, and a neutral pelvis. Small, repeatable alignment choices stop compensations and keep the back safe as you fatigue.
Hands, shoulders, and pelvis alignment
Set your hands under the shoulders and spread the fingers for a stable base. Keep a straight line from head to heels by gently tucking the ribs and leveling the pelvis.
Engage shoulder blades toward the back pockets to avoid shrugging and keep the chest open while the head stays neutral.
Hips, glutes, and rib positioning on the floor
On the floor, press the ribs down and keep hips square. Contract the glutes so the lumbar region stays supported during leg and arm motions.
In bracing drills, press the low back to the floor as a quick check before moving the left leg or the right arm. This prevents the low back from arching.
Return to the starting position with control
During bird dogs, extend the right arm and the left leg without rotating; pause, then pull them back in while holding trunk tension.
In rotational work, initiate from the torso and hips rather than yanking with the arms. Keep feet planted and knees soft for control.
Return starting position under control after every rep — own the eccentric to build reliable motor patterns. Cue “exhale on effort” and maintain a light brace so breathing stays smooth while the core stays active.
- If alignment breaks, reduce range or load and recheck pelvis and shoulder stacking.
- Use short, deliberate reps to reinforce correct position before increasing speed or weight.
| Check | How to cue | Why it matters |
|---|---|---|
| Hands placement | Under shoulders; fingers spread | Stable base for arm and leg drives |
| Shoulder blades | Pull toward back pockets; chest open | Prevents shrugging and neck strain |
| Pelvis & hips | Level pelvis; glutes on; ribs down | Protects low back during motion |
| Return | Controlled eccentric; exhale on effort | Builds motor control and repeatability |
Programming Your Weekly Core Routine
Build a weekly blueprint that pairs brief midsection drills with your main training days. Keep each session short so you stay consistent and avoid fatigue during heavy leg or knee work.
How often: weekly frequency for results
Train this area 2–3 days per week. Add 1–3 focused exercises to workouts you already do. That keeps practice regular without long extra sessions.
Sets, reps, and time under tension guidance
Use 3–4 sets of 8–15 reps or 20–40 seconds for holds. Choose the version that keeps form crisp. Track load, rest, and quality rather than chasing duration alone.
Progression: increase load before duration
Progress by weight or difficulty — for example, a weighted plank or a loaded pull‑through — before adding longer holds. Vary movement planes each week: anti‑extension (plank), rotation or anti‑rotation, and a lateral choice.
- Rotate movements every 4–6 weeks; keep 1–2 staple lifts you track.
- Balance heavy leg days with simpler midsection choices to manage fatigue.
- Keep a training log to note sets, weight, and quality so you know when to nudge progress.
- Respect recovery: sleep, nutrition, and light mobility aid gains.
Common Mistakes That Undercut Core Gains
Simple alignment mistakes often hide behind sweaty reps and slow visible gains. Fixing them usually gives faster progress and less pain.
Letting the hips sag in plank lines
Don’t let the hips drop. A sagging line shifts load to the lower back and defeats the purpose of the plank.
Quick fixes: keep a firm brace, squeeze the glutes, and check that the pelvis stays neutral. Pack the shoulders and keep your gaze slightly ahead of the hands to avoid neck strain.
Overusing hip flexors and arching the lower back
When the hip flexors dominate, the pelvis tilts and the lumbar spine takes extra stress. That shows up as arching and rib flare during lifts.
- Avoid endless plank time trials; add resistance like a pull‑through or weighted variation instead of chasing seconds.
- If you feel the lower back more than the abs, reduce range, reset the pelvis, and exhale on effort to re‑engage the core.
- Slightly bend the knees in hanging leg raises to limit hip flexor take‑over and protect the spine.
- Slow your movement and control both the lift and the descent so the legs and shoulders don’t use momentum.
Who Should Be Cautious and When to Modify
If you have low‑back symptoms, the smart way to return to training is slow and deliberate. Test gentle moves first and watch how your body responds.
If you have chronic low‑back pain, consult a qualified trainer or healthcare professional before attempting higher‑load flexion work like crunches. Start with safer options such as toe taps, dead bugs, and bird dogs.
Existing back pain and when to consult a professional
Key signs: sharp pain, numbness, or pain that shoots into your legs or down past the knees. Stop and seek guidance if symptoms worsen during an exercise.
- If you have current or recent back pain, begin with gentle activation drills and consult a professional to tailor exercise choices and progressions.
- Keep the spine neutral and avoid high‑load flexion early; choose moves that let you breathe, brace, and move without symptom spikes.
- Use lighter weight and slower tempo to test tolerance; monitor hips, knees, feet, and how surrounding muscles respond.
- Swap provocative exercises for safer alternatives—toe taps instead of crunches during a flare‑up.
- Respect recovery: increase volume gradually to avoid aggravating sensitive tissues and protect long‑term fitness gains.
Conclusion
A simple, consistent approach wins: brief, high-quality practice done 2–3 times per week builds real change. Use 3–4 sets of 8–15 reps, log progress, and add load before chasing longer holds on the plank or similar work.
Mix standing and floor work. Standing drills like cable woodchops transfer well to life and sport, while floor drills help you refine the brace and muscle control. Pick anti-extension, rotation/anti-rotation, and lateral choices to cover all planes.
Make this a short routine that trains stability and strength across the front, back, and obliques. Keep the line from head to heels, breathe on effort, and prioritize form. Small, steady steps turn good exercises into lasting, usable strength for your whole body.
FAQ
What muscles make up the body’s midsection and why does that matter?
The midsection includes the rectus abdominis, internal and external obliques, and the transverse abdominis in the front and sides, plus spinal supporters such as the multifidus and erector spinae in the back. The pelvic floor, diaphragm, glutes, and hip flexors also play a big role. Together these muscles control posture, breathing, balance, and spinal stability, which helps prevent lower back pain and improves movement during daily tasks and sports, and consider exploring yoga-based core stability practices for additional techniques.
How should I engage my midsection before starting exercises?
Breathe diaphragmatically, then gently draw the belly button toward the spine without holding your breath. Brace as if preparing for a light punch to the stomach. On the floor you can press your lower back into the ground briefly to feel engagement; standing, switch on the glutes and keep ribs down in a neutral spine. These cues protect the lower back and improve force transfer during movement.
What are safe beginner moves that target stability and the pelvis without straining the lower back?
Start with glute bridges (lift hips, squeeze glutes, then return to starting position), dead bugs (opposite arm and leg reaches while maintaining a flattened lower back), bird dogs (extend the right arm and left leg into a straight line), and supine toe taps. These exercises emphasize control, teach hip-hinge and pelvic cues, and reduce reliance on hip flexors.
How do I progress from beginner to intermediate work?
Add time under tension and complexity: increase plank duration and try anti-extension variations, layer in mountain climbers for metabolic stress, and perform controlled crunch variants like warrior or bicycle crunches for loaded flexion. Prioritize quality over quantity and raise load before simply adding duration.
Which advanced moves best challenge full-body control and spine stability?
Hanging leg raises and hollow rocks tax the front line, while barbell rollouts and plank pull-throughs test anti-extension strength. The Turkish get-up combines rotation, anti-rotation, and single-leg stability to train the spine under load and improve total-body coordination.
How can I build rotation and anti-rotation strength safely?
Use controlled rotational tools like Russian twists and cable woodchops for purposeful rotation. For anti-rotation, practice the Pallof press and single-arm farmer’s carries. Include lateral flexion and anti-lateral flexion work to balance movement patterns and protect the spine.
What cues keep my lower back safe during training?
Maintain a neutral spine—head, chest, and hips aligned—avoid excessive arching or hip sag in planks, and stop if you feel sharp pain. Use regressions like toe taps or reduced range of motion to protect the lumbar region while still building muscle and endurance.
How often should I train the midsection to see real improvement?
Aim for 2–4 focused sessions per week depending on overall program and recovery. Mix shorter daily activation drills with 2–3 dedicated core sessions that include stability, rotational, and anti-extension work. Adjust frequency based on fatigue and progress.
What programming variables matter most—sets, reps, and time under tension?
For endurance and control use higher time under tension (30–90 seconds per set) or 12–20 controlled reps. For strength, use heavier loads with 4–8 reps and longer rests. Progress by increasing load, complexity, or duration rather than adding endless reps.
Which equipment adds the most benefit to finishers without losing form?
TRX rows integrate pulling with core stability, medicine ball slams add explosive hip and torso drive, and cable woodchops teach clean diagonal patterns. Keep weight manageable to maintain a straight line through the torso and avoid compensations in the hips or shoulders.
What are common form mistakes that reduce results or cause pain?
Letting the hips sag in planks, overusing the hip flexors during abdominal work, and arching the lower back during rollouts and crunches are frequent faults. These errors shift load off the target muscles and increase strain on the spine. Focus on alignment and controlled return to the starting position.
Who should modify exercises or see a professional first?
Anyone with current lower back pain, recent surgery, pelvic floor dysfunction, or uncontrolled medical conditions should consult a physical therapist or physician. Modify by reducing range, avoiding loaded flexion, and prioritizing anti-extension and stability drills until cleared.